Open the projects.sln from the projects directory in the downloaded Half-life Master
C:\_Projects\halflife-master\projects\vs2010\projects.sln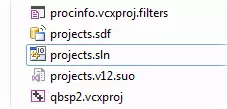
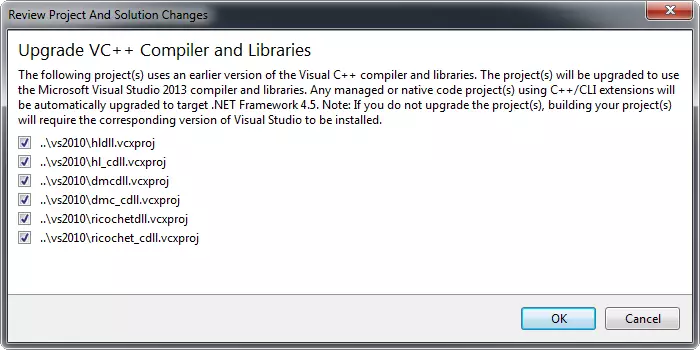
Note: You may see the following if you are using a version of Visual Studio newer than 2010 Simply click OK and let it work. This is the conversion process I noted earlier.
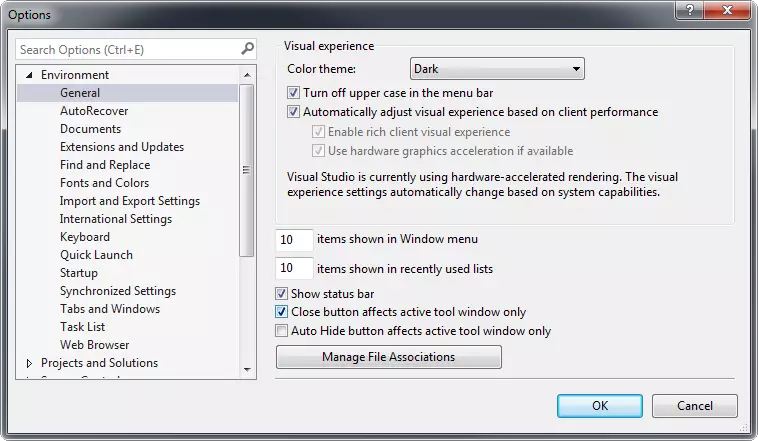
I also suggest you change the color scheme to Dark to make viewing and editing the code easier. This can be done from Tools > Options > Environment > General and setting Color Theme to Dark
To the right hand side of the IDE note the Solution Explorer which should have 6 projects included:
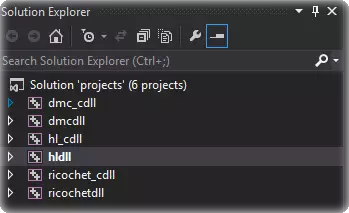
The one of interest to us is hldll as highlighted in bold ( Bold highlighting indicates that it is the start-up project )
If it is not highlighted in bold simply right click on it an Select Set as StartUp Project.
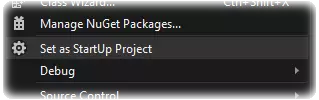
We need to make some changes to hldll’s properties. To access these simply right click and select Properties.
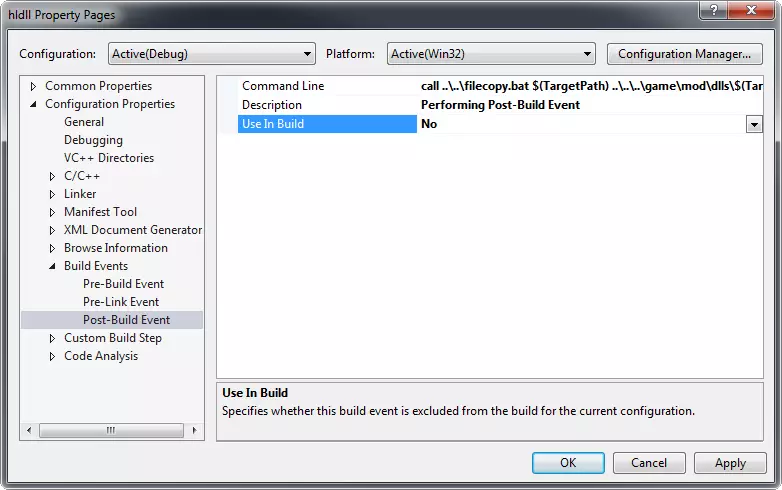
Firstly let’s change Configuration in the top left corner to “All Configurations”. This means that changes we make to the properties page will propagate through all project configurations in this case both Debug and Release.
Then we should turn off the post Build process which can be disabled by setting Use In Build to No in Configuration Properties > Build Events > Post-Build Event ( This command when it works correctly would have copied the complied DLL to the Mod directory, simply put for the scope of this tutorial we do not need it )
Next we must Change under Configuration Properties -> General the Output Directory from:
$(Configuration)\$(ProjectName)\to the directory inside your Half-Life installation where hl.dll resides. In my case it is here:
D:\Programs\Steam\SteamApps\common\Half-Life\valve\dlls\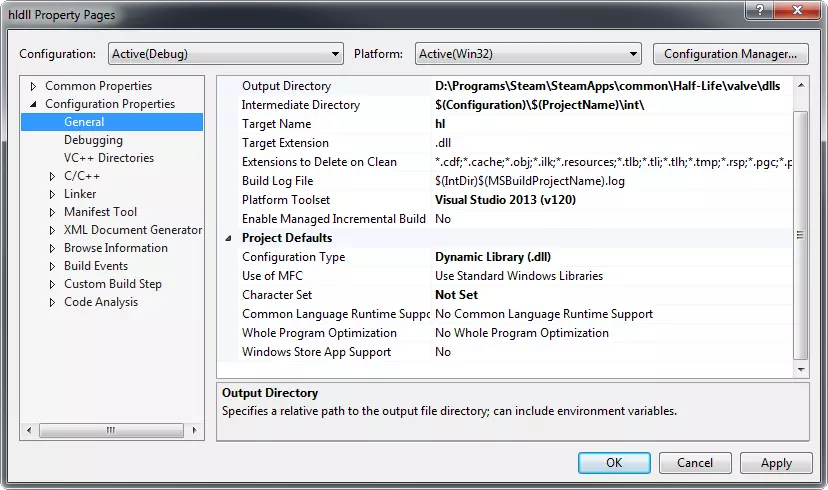
If we want to be able to debug our code within Visual Studio we need to tell Visual Studio where hl.exe resides.
Under Debugging -> Command provide the path to hl.exe.
For me this is:
D:\Programs\Steam\SteamApps\common\Half-Life\hl.exeAdd the following to Command Arguments:
–windowed –debug –devSet the working directory to the root Half Life Directory,
in my case:
in my case:
D:\Programs\Steam\SteamApps\common\Half-Life\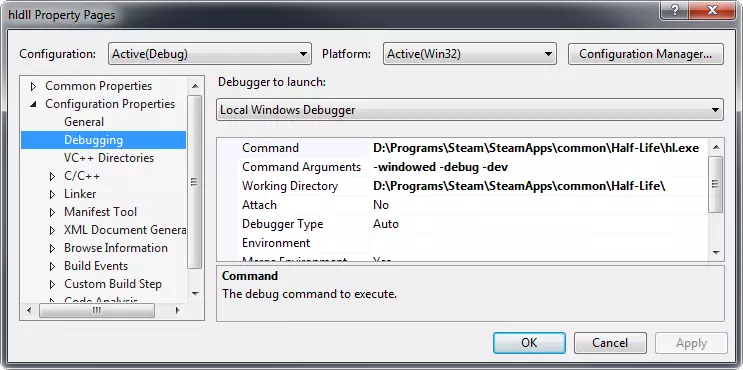
We should Unload the remaining Projects in the solution that we are currently not using. Right click on all unwanted projects (hl_cdll, dmcdll, etc..) and select Unload from the menu. hldll should be the only remaining “loaded” project.
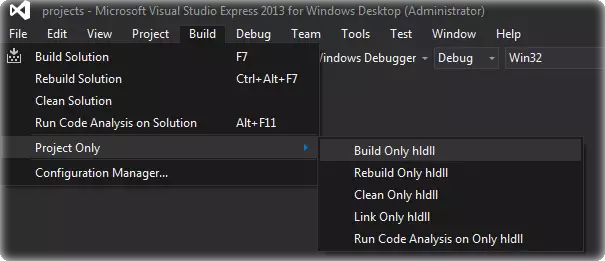
Now it is time to build the project for the first time,
Under Build Select Project Only > Build Only hldll ( saves time compared to building all projects )
If you unloaded all other projects you can simply click under Build “Build Solution”, it will build the remaining loaded projects.
It should take a few minutes and you will probably get quite some warnings in the Output towards the bottom of the screen, This can be ignored (These errors occur due to changes to C++, Visual studio and the source code down through the years)
The SDK was developed originally in the mid-nineties and was not updated for new C++ standards when it was released on Github in 2013
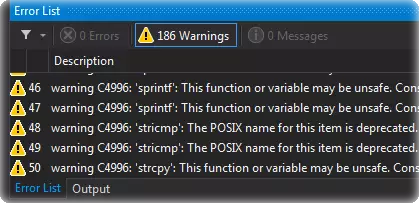
Let’s disable these common warnings.
Right click on hldll and under Properties navigate to Configurations Properties -> C/C++ -> Advanced, (Make sure to set “All Configurations” so that it affects both Debug & Release)
For “Disable Specific Warnings“ add the following:
Under Build Select Project Only > Build Only hldll ( saves time compared to building all projects )
If you unloaded all other projects you can simply click under Build “Build Solution”, it will build the remaining loaded projects.
It should take a few minutes and you will probably get quite some warnings in the Output towards the bottom of the screen, This can be ignored (These errors occur due to changes to C++, Visual studio and the source code down through the years)
The SDK was developed originally in the mid-nineties and was not updated for new C++ standards when it was released on Github in 2013
Let’s disable these common warnings.
Right click on hldll and under Properties navigate to Configurations Properties -> C/C++ -> Advanced, (Make sure to set “All Configurations” so that it affects both Debug & Release)
For “Disable Specific Warnings“ add the following:
4028;4058;4996Apply these settings and compile again. The warnings should no longer be present in the log.
You should see that the build has succeeded, You can now double check the generated hl.dll file’s timestamp to ensure that it created a fresh Library in the right location.
For me it can be located here:
You should see that the build has succeeded, You can now double check the generated hl.dll file’s timestamp to ensure that it created a fresh Library in the right location.
For me it can be located here:
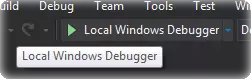
D:\Programs\Steam\SteamApps\common\Half-Life\valve\dlls\If all looks good we can now try and run the game from within Visual studio. Click on Local Windows Debugger to launch the game.
You will get the following error if Steam is not running:
You will get the following error if Steam is not running:
Failed to Initialize authentication interface. Exiting…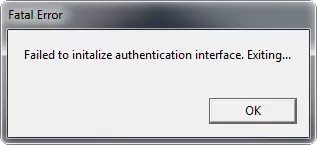
Start up Steam, Half-Life should then run and you should be able to play through the original game without issue.
So let’s do something to the code:
Let’s add a message for when the player jumps.
To do this locate player.cpp inside hldll > Source Files > dlls in Visual Studio 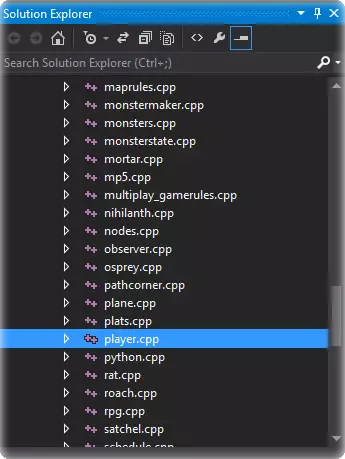
Ctrl – F to Find the word “Jump”
Locate the following:
case PLAYER_JUMP:
m_IdealActivity = ACT_HOP;
break;
Let’s append a line that outputs a custom message when the player jumps in-game
case PLAYER_JUMP:
UTIL_ClientPrintAll(HUD_PRINTNOTIFY, UTIL_VarArgs("Hello Half-Life")); // Message
m_IdealActivity = ACT_HOP;
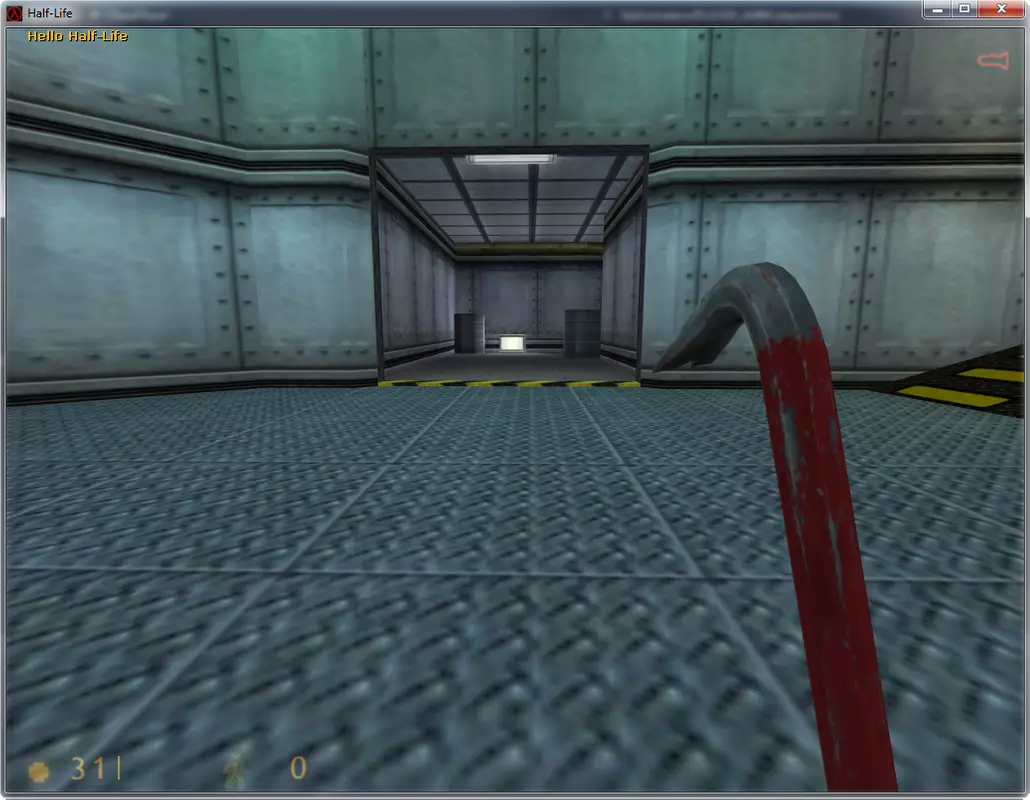
break;Save the changes and build hldll, Then enter the game and jump. You should see in the top left hand corner the message “Hello Half-Life”