
Table of Contents
Perforce (now known as Helix)
You will need to download at least two tools from Perforce. P4D & P4V (P4VS is optional). The Perforce license lets you to use their software free if your team is small (less than 20 people) which should be more than enough for small indie mods/Games. You can find the Perforce tools here.
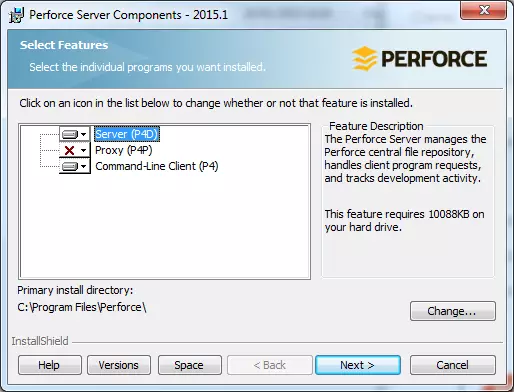
P4D:
- Launch the installer for the Perforce server components. The defaults here will suffice.
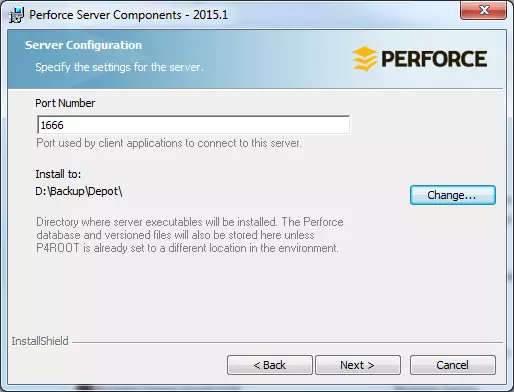
- Set the port number, the default of 1666 should be fine. It is important to set the location of where you want your files to be backed up to. Its best to make it a separate drive to the one you will be working from.
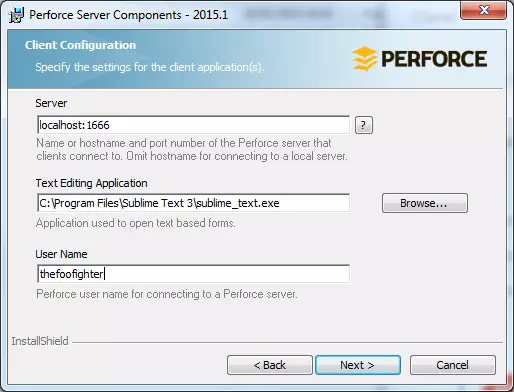
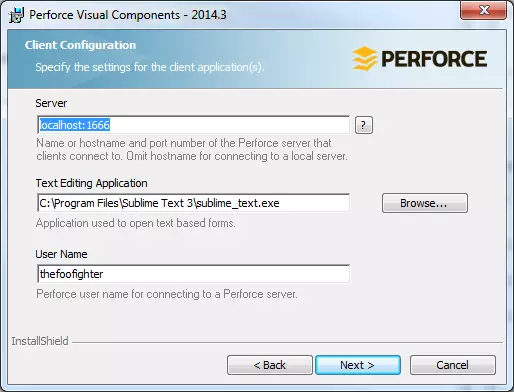
- You will want to customize the following settings, Set the server to localhost:1666, Select a Text editor if you have one more advanced than Microsoft’s Notepad, select a username that you will use to login to your server.
P4V:
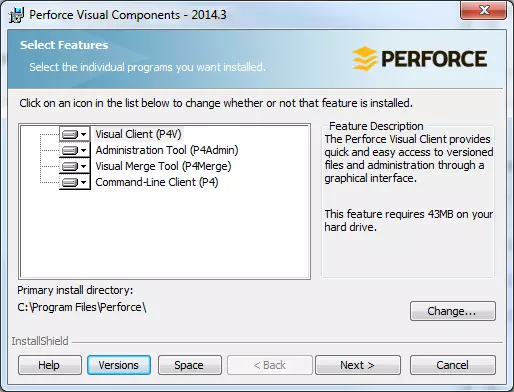
- While installing Perforce visual components the defaults suffice on the first screen.
-
On the second screen the installer should remember your settings from the server installer
The first thing you will need to do is set up the environment for working with Perforce. I would highly suggest keeping your Perforce Depot/Repository on a separate drive to the one where you will be doing your coding.
Depending on your preference as a developer you might keep your source files separate from your finished game files or relatively close.
What do I mean by this? Source files in this case would be C++ code, Photoshop art, and model files such as obj, dae etc., uncompiled map files. These files are only for development and generally are not released to the public unless you are making it open source.
Finished game files would be dll’s, tga’s, wad’s, mdl’s etc. These files would be compressed, tested and packaged neatly and basically what your players will need to play the game.
In the case of this tutorial my source files will be close to the finished files for the sake of simplicity. However I will be versioning both.
Source Directory
My main working directory (code/art/models) is located at:
C:\_Project\SampleGameTarget Directory
My Perforce depot is located at:
D:\Backup\DepotEnvironment Variables
If you ever need to change some features of your Perforce setup such as Port, Root, Client etc. There are two methods:
- Through CMD via P4 SET
You can check what your current environment settings are for Perforce in the command line. Run CMD and type:p4 setP4 is the Perforce command line utility and was installed with the Perforce visual components. You should see something similar to the following:
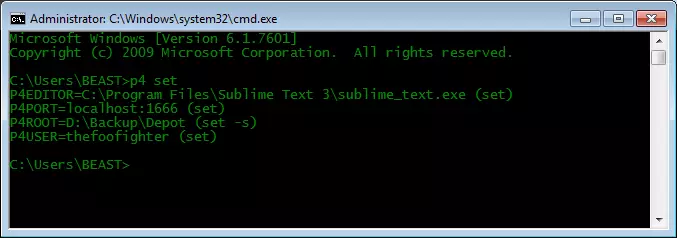
Note: They might not all be present on your system, don not worry you may not need them but you can create them easily as shown below.
If you wanted to change one of these it is as simple as the following:
p4 set -s P4PASSWD=12345p4 set P4ROOT=D:\Backup\Depot -
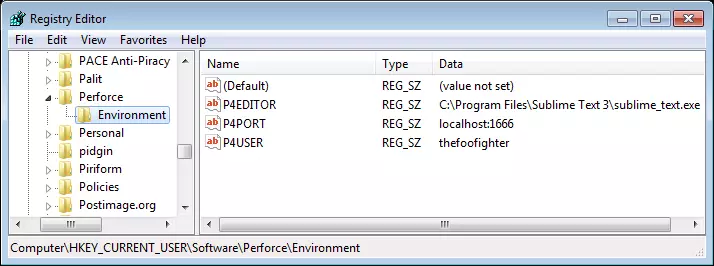
You can also check these values and edit them through Regedit. Launch Regedit and locate the Perforce environment. It should be here:
HKEY_CURRENT_USER\Software\Perforce\EnvironmentRight clicking on any of these values lets you modify them.
The next tool we need to check out is P4Admin which should have installed with the Perforce visual components.
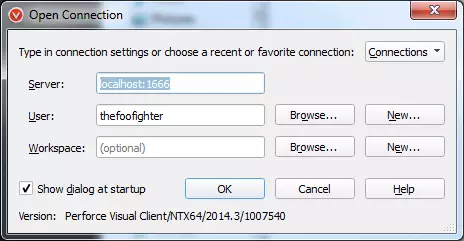
The Open Connection Dialog should appear.
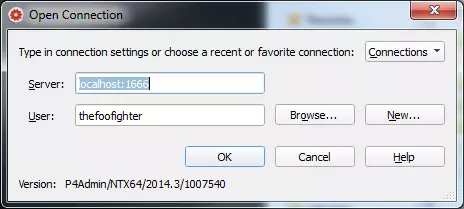
In my case the user did not exist when I tried to open the connection.
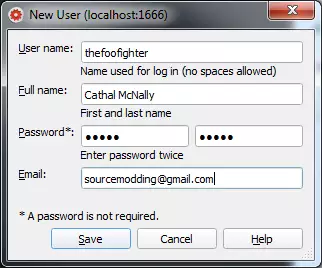
So we just create a user.
Click on New and fill out the new user details.
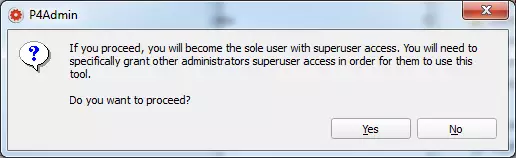
You will be presented with the following message if you open the connection. Hit yes because you want to be the administrator on this server.
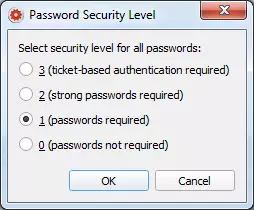
P4Admin lets you create and manage users, groups and set permissions to each. For our use case, it is not necessary. The last thing I would advise you to do would be to require a password for the depot. You can change the password security level through the administration menu entry.
P4V (GUI for Perforce) is where you typically would create the connection from your local working files and where you want to place them in the Perforce depot.
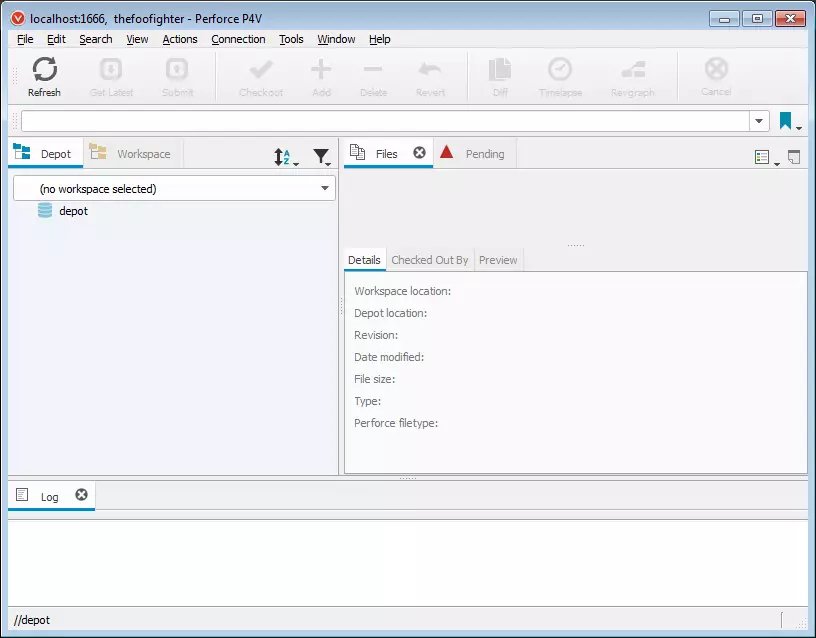
Firstly start up P4V. You should see this:
P4V looks something like this:
(It may seem daunting at first but it is not a difficult program to master, you probably will not need to use the majority of functions Perforce provides.)
A Workspace is what Perforce names the link between your local files and the server files. You will do all your work on the workspace and then submit to the server. If someone else does some work on the server you can copy those files down to your workspace if you like.
The following diagram explains it a little better. Each user / client connects to the server and create a workspace to clone the files that reside on the server to their own machines for editing.

Expand the workspace mappings arrow, and then on the right select the text view to visualize the mappings between the depot and your local files.
Give your workspace a good name and set its root to the directory of files you want to version.
Your workspace text view will probably look different to mine as I have added two further lines. The left side represents the server mappings and the right side is your local workspace mapping based on the workspace name.
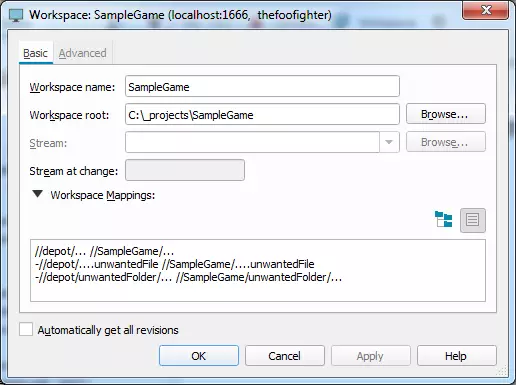
I have added these to demonstrate how to omit certain files and folders from being submitted to the server. You simply add a minus (-) symbol in front of the line you want Perforce to omit. In this case I want perforce to omit all files with the extension .unwantedFile as well as everything inside the folder called unwantedFolder.
-//depot/....unwantedFile //SampleGame/....unwantedFile
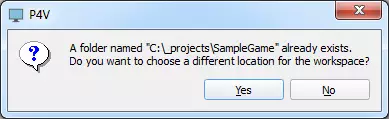
-//depot/unwantedFolder/... //SampleGame/unwantedFolder/...Let’s continue by clicking OK. If you are prompted with the following message select No as you want to version any files that may already exist there. In my case I already have some code and art prepared for demonstration.
If a wizard pops up simply cancel it, we will add the files manually now.
In Windows explorer back in my SampleGame folder I will now create some sample folders and files for demonstration. You can do the same yourself here with your own Project files.
Back in P4V it should look something like this now:
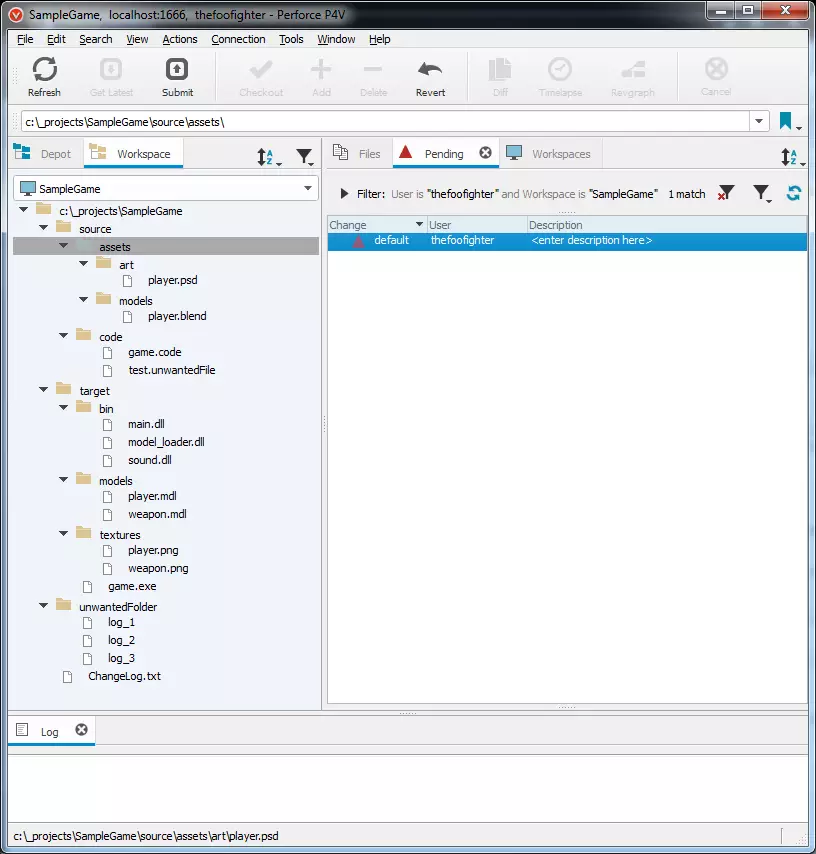
Lets make an initial commit of all our files so that we can populate the server with version 1 of our SampleGame
To do that we simply need to select the root directory and click Add.

Note: It is always a good idea to create descriptive changelist descriptions as it will become very useful if you ever need to backtrack on changes you made as it will be easier to locate the changelist that you made the change in.
Back in the main Perforce window the pending changelist tab should look similar to this.
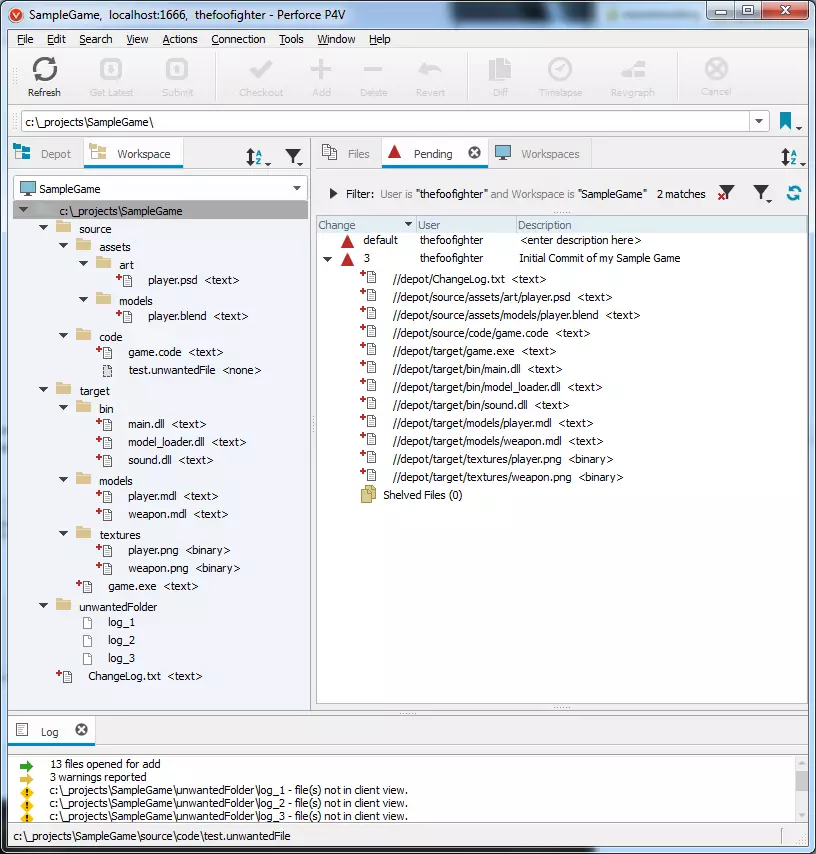
Expand your newly created changelist. You will notice that there is now a small red plus icon next to each file that is currently pending addition to the server.
Note: You may have noticed from the screenshot above that the files we asked Perforce to omit, do not have the small red plus (+) and are not pending addition to the server.
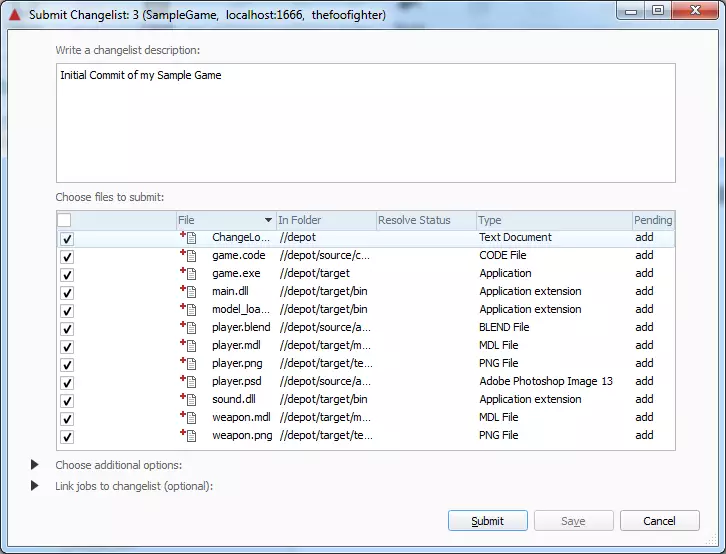
You can now click on submit from the main menu. Perforce will present you with the submit dialog so you can overview what exactly you are submitting.
-
Show in Explorer:
To locate a file inside windows through Perforce select the file or folder Right Click -> Show In -> Windows Explorer or use the shortcut CTRL-SHIFT-S.
-
Add a new File:
The same procedure as before except let us add a specific file that we can used as a config for our game.exe. This is typically a text document. Create the file through Explorer in the SampleGame\target directory. I’ve called mine settings.cfg. Back in Perforce locate the file you created (Hit F5 to refresh), Note that the file does not have a green mark next to it so it is not currently versioned. Let us fix that, Right Click on the file and Mark for Add. Add it to a changelist with an appropriate description and submit.
-
Check-in/Checkout:
Files added to Perforce are initially read-only to prevent users from accidentally changing or breaking something. If you want to modify something you must first check it out. Let us add some text to the changelog. You can click and drag it to the default pending changelist or you can right click and select check out. Notice that the file now has a small red check next to it.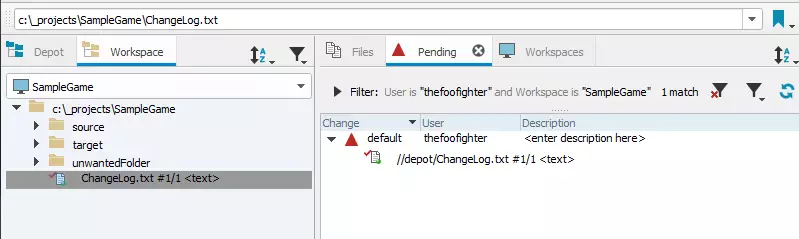
This highlights that it is no longer read-only and is ready for editing. Open the file in a text editor and add some text.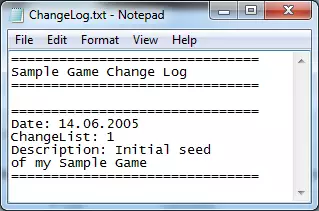
Save the file. You can now submit the file through Perforce. Notice that the file now says #2/2 this is the count of revisions the file has and which one you currently have. You can check out older versions of the file if you wanted to work with that instead.
-
Diff:
This function lets you check the difference between revisions of files or completely other files. If you are familiar with Beyond Compare it works much the same way. Let us test it. I made an intentional mistake in the change log. The date claims to be 2005, It should have been 2015. Check the file out again and make the fix. Check the file back into the depot and now let us Diff it. To make this a little easier to see, under View -> select History and then select the change log file in the tree.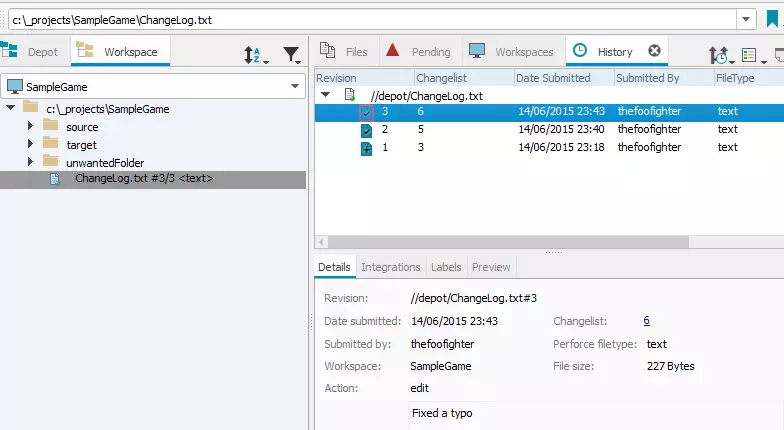
You can see that we have 3 revisions of the file. The easiest way to diff a file is to drag one revision on top of another. Try it and examine the results by dragging version 3 on top of version 2.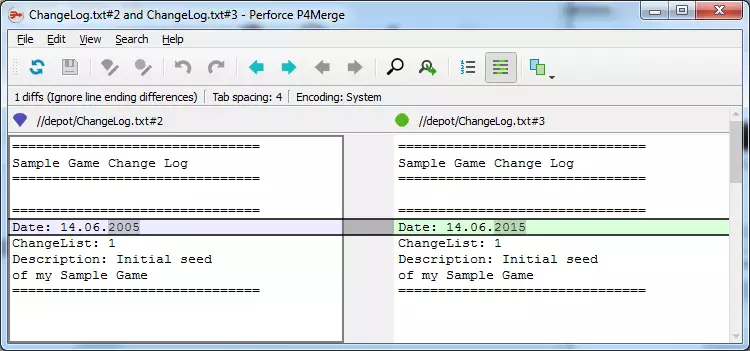
The line where the spelling mistake is the difference between both files. You can already see from this simple example how useful this can be when comparing revisions of code to see where a function was added or removed and when. Herein lays one of Perforce’s greatest strengths. The Diff feature will work with image files as well.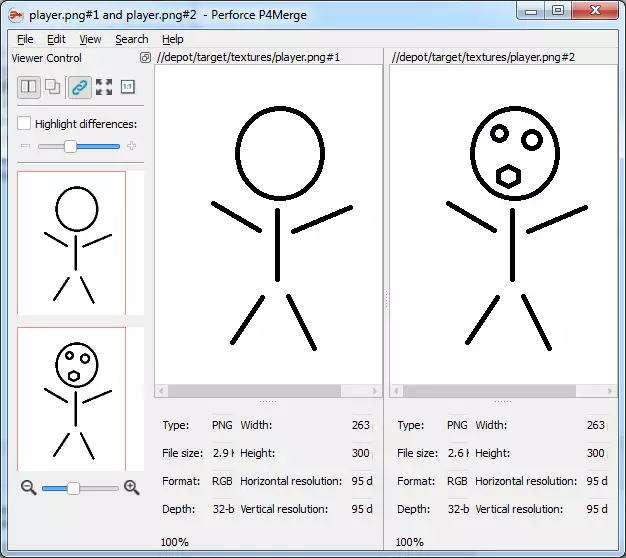
-
Delete a file from the server:
Right Click -> Mark for Delete. Perforce will ask you to add it to a pending changelist. You can create one for this. Below I am deleting a file my project will not be using. Notice that it adds a red X next to the file to denote that it is to be deleted.
-
Reverting:
Another great feature of Perforce is reverting, let us take the change log for instance and check the file out. Open the file and write something in it, you realize you have made a mistake and rather than wasting your time, deleting the text within the file you would rather have a fresh instance of the file. Simply right click on the file in question and select Revert. This will remove the file from the changelist. You can Check the file out again and start fresh. -
Rollback/Backout:
This is one of the main features of any versioning system. You want to retrieve a previous version of a file you had or recover a file you deleted. To Backout of a changelist simply returns the files selected to the previous revision and adds it to a pending changelist so that you can add a comment as to why you backed out. Rollback is a similar function but rather than being restricted to a changelist it grants you the ability to rollback as far as you like and with as many files as you like. Read more here. -
Reconcile Offline Work:
Let’s say you are working hard, forgetting to add new files to Perforce and create a bunch of files while you are coding and they are located in different locations. To save you having to add each one individually in Perforce you can right click on the root directory and select Reconcile Offline work, this will add the files to a new pending changelist for you to review and ultimately add to the depot.
P4VS
Perforce Visual Studio Plugin (Note: this will not work with Express versions of Visual Studio)
If you have Visual Studio installed you simply have to double click on the .VSIX to install the plugin. 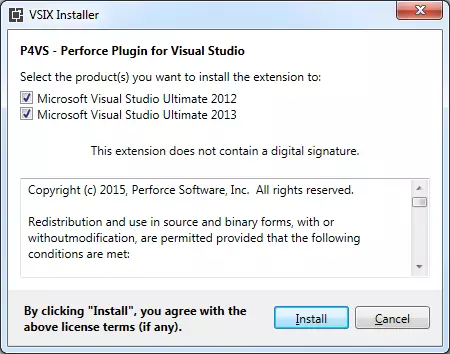
The purpose of the plugin is to streamline the process of checking in and out files without having to open up the Perforce GUI. I would suggest getting familiar with the Perforce GUI and its terminology before jumping into the deep end with the plugin.
Start-up Visual Studio and open Tools -> Options.
Now if the plugin installed correctly you will see an option for P4VS under source control. Select this. 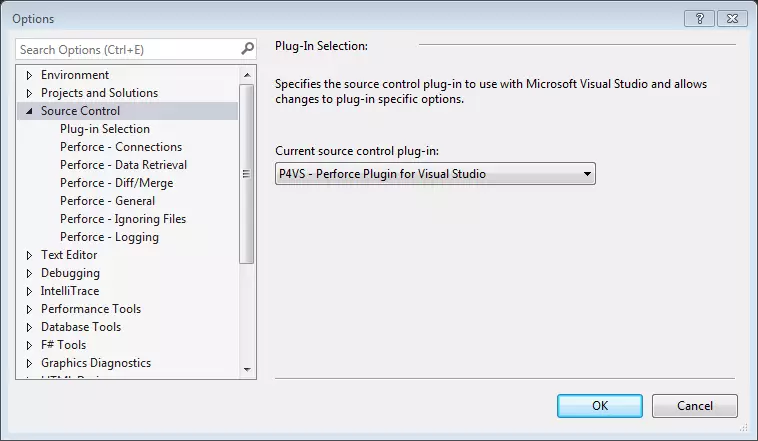
Further options will crop up under source control specifically for Perforce. The only one you need to worry about is connections. Make sure under connections “Show the Perforce Connection dialog” is selected.
Now under File Select -> Open Connection to a Perforce depot. 
Enter the details you need to make a connection to Perforce: 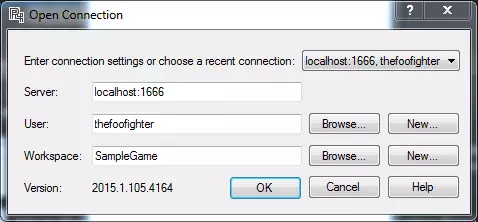
Now you can open the project through File -> Open Solution/Project in Perforce Depot. Select your Visual Studio solution from its directory. 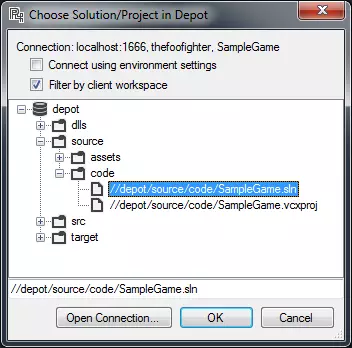
If your solution was checked into Perforce you will probably see something along the lines of this dialog asking you to checkout the readonly files for editing. It is similar to the P4V dialog. Be sure to check the file out if you want to edit it. 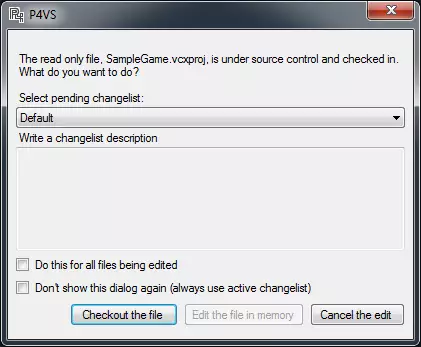
If you add a new file in Visual Studio, Perforce will also ask you if you want to add it for version control. 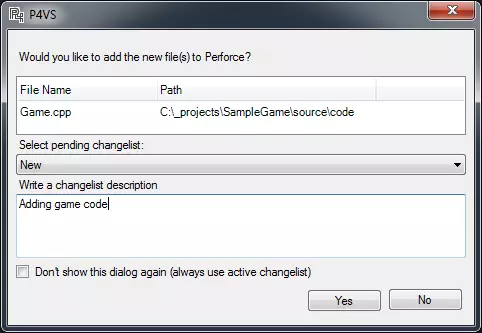
In the solution explorer you should see something similar for your own project. 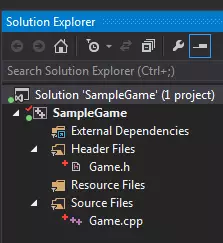
A helpful toolbar comes packaged with the plugin. You can enable it through View -> Toolbars -> P4VS. This provides useful buttons that are much the same as what the Perforce GUI provides. 
You can right click on code and check it out, you will notice that it will be added to a changelist inside the Perforce GUI. 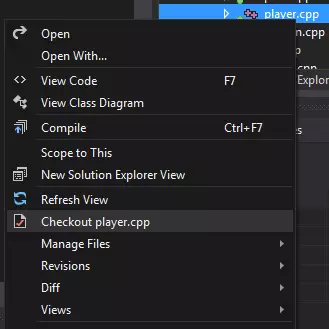
There is a useful context menu for Perforce when you right click on files that either are versioned or can be versioned. 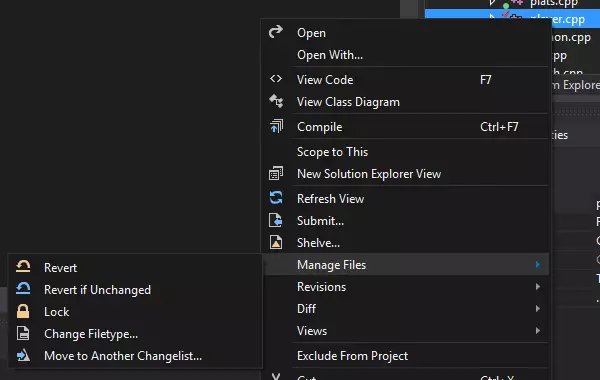
P4D on Ubuntu 12.04:
Perforce ideally should be setup on a completely different machine to the one you are developing for reasons that don’t really need explaining. This setup comes in very useful if you need to share your perforce depot with team members who are offsite and often in other countries to develop through.
I make some assumptions:
- You do indeed have a server
- Ubuntu 12.04 is the headless operating system we will be working from (should work any recent Debian)
- You are comfortable inside a headless server installation
- You have Putty (or equivalent installed) or direct access to the terminal
Open Putty and login to your server 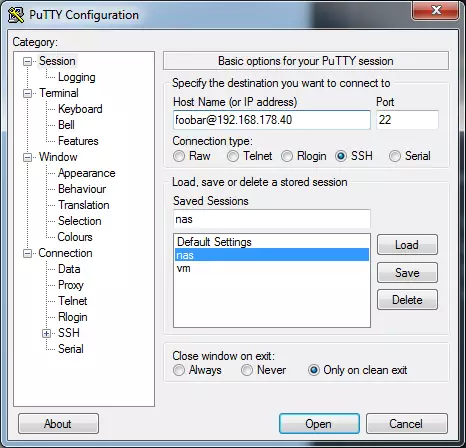
In case you are not already (or don’t have the privileges) make yourself root with:
sudo -iAnd enter your password… We will need to get the latest P4D for Linux, check what build of Linux you are using so as to download the correct one. Try this to figure that out.
uname -iIf the command responds with i386 in the result you are on a 32bit machine
Else it should contain x86_64 for a 64bit OS
Lets change directory to where we will want to download and run Perforce.
cd /usr/local/bin/Back on your client machine in your browser navigate to…
http://www.perforce.com/downloads/helix
Look for P4D and download the right version for your setup. 
Depending on the internet browser you are using you should be able to decipher the link from the downloads Tab, Once you find it copy it to the clipboard. In Chrome it is here: 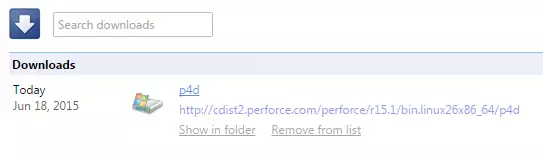
Back in putty type…
wgetand then either right click or use SHIFT-INSERT to paste the copied link 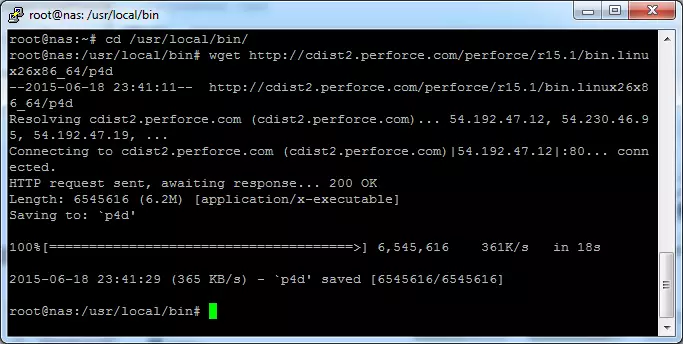
Now lets make the downloaded file executable.
chmod +x p4dIts important that we create a directory where Perforce will save the server files and depot.
This will vary from machine to machine.
In my case I have a special location called storage so I will create a dev directory there. 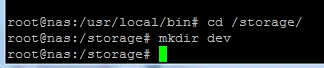
Now lets start Perforce with some flags for a basic server setup.
- -d starts Perforce as a daemon
- -p sets the port
- -r sets the root location you want to save your files to
p4d -d -p 1666 -r /storage/dev/
It would be a good idea to add p4d to the startup items for your server.
Now you should be able to connect to the server using the servers IP address and port 1666 through P4V on your client machines.