Compiler
Install Visual Studio for C++ ( you are required to create a free account )
Downloads can be found here for the free version. You may have to do some digging for the older versions.
Note: I will be using Visual Studio 2013 as it’s the latest version of Visual Studio you can use that doesn’t require you make changes to the HLSDK just so that it will compile. If you must use the latest and greatest you can try a fork of the SDK from Malortie which should compile with Visual Studio 2015.
HL SDK
Download the Half-Life SDK from Valve’s Github repository, Hold onto this file as we will be using it later.
If you use Git as version control you can use GitHub Desktop to Fork and Clone the official repository.
You could also fork the Where is Poppy Repository if you want to check its code out instead.
Debug Vs Release
There will be two Mod folders during the life of this Mod, it is not necessary for you to following exactly along these lines but my reasoning for each are as follows:
WereIsPoppy_dev: This is my initial playground, a sandbox for new features, code I am currently working on and developing. I will use this for the tutorials.
WhereIsPoppy_rel: This is a duplication of my Develop branch. Typically, I would merge the contents or individual features from my Develop branch here once they are complete and in a stable state. This branch should be relatively bug free and used for testing and release.
This system also doubles as an aid for me when I am creating these tutorials as I typically test a concept first in Develop and merge to Release. Then when I start recording the Tutorial I wipe the Develop branch or return to the previous tutorials state knowing that I have a copy in the Release branch and use Develop to teach the lesson. After each tutorial in this series I will commit Release to GitHub for those following along.
Using Perforce (Helix) for Version Control (Optional)
You can use whichever version control system you like. For this series of tutorials, I will be using Perforce. This first tutorial will be the only one to mention Perforce as I walk you through setting it up for a Goldsrc mod. Those of you using alternatives or no source control (you really should be) can safely skip over the Perforce sections or modify them to suit whatever system you are using.
Download and install Perforce
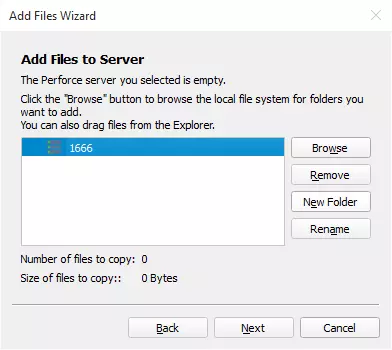
You can get the version I am using here. Otherwise head over to Perforce to get the latest and greatest. First install the server component “helix-versioning-engine-x64.exe”
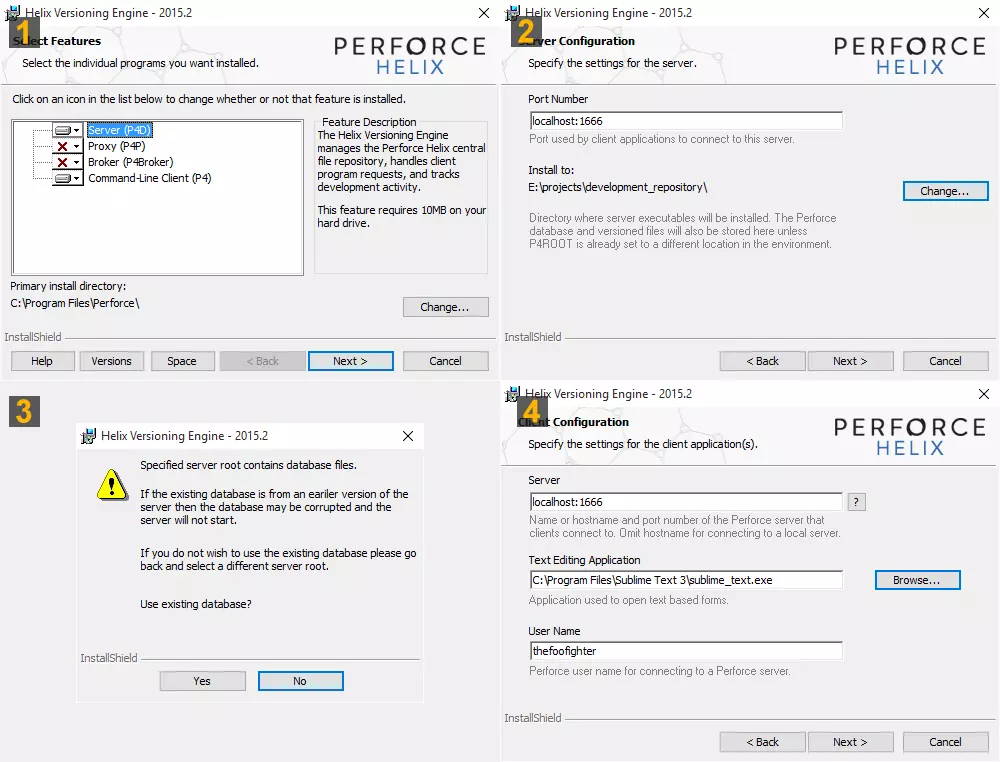
- Select the components you want to use; the defaults should suffice.
- Under Server configuration set the server to “1666” unless you have a server elsewhere. Set the location where you want your server repository to reside. Typically, this is on a different hard drive to the one your actual project is on so that in the event of hardware failure you have a backup.
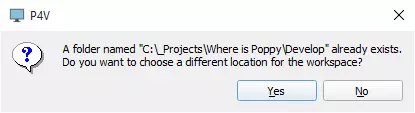
- If a repository already exists in the location you select you will be greeted with this screen, It’s up to your own discretion what to do in this situation but if you are like me and moving occasionally from one pc to another I will select “Yes” to use the predefined repository.
- Next up is to set the Server to “1666” (set it elsewhere if you have a server elsewhere on your network but in my case the server is on my work machine.), Set your preferred text editor and then a username you will use for admin on the server.
Install the client component “p4vinst64.exe”
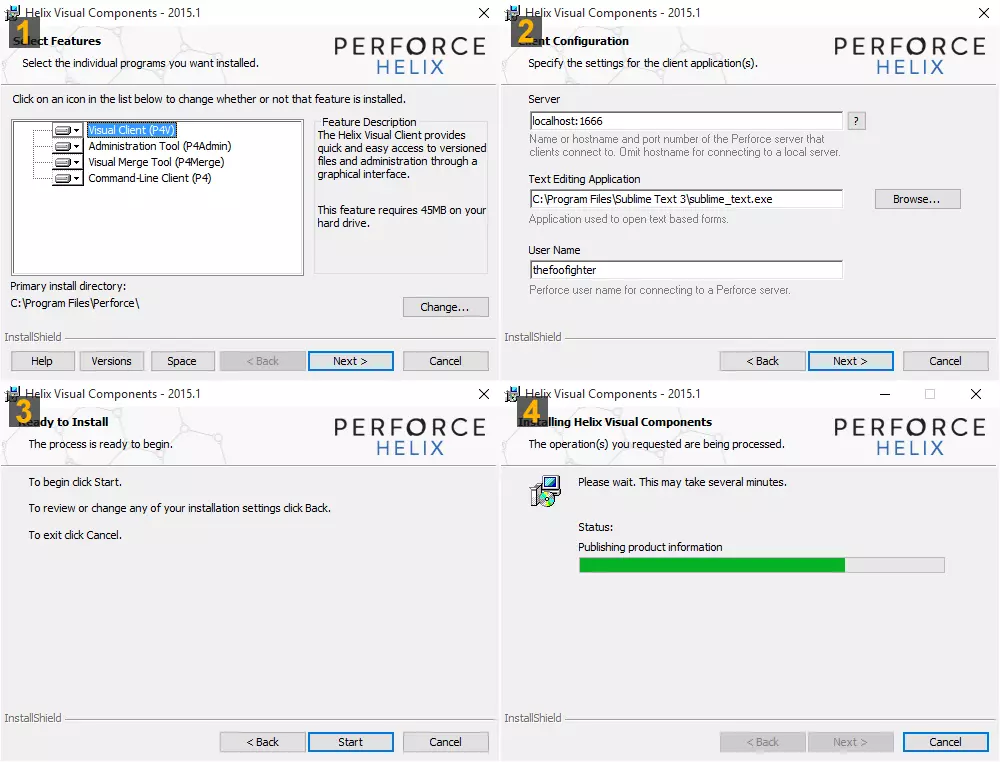
- Select the features you want; I use all of them.
- Set the Server to “1666” unless you have a separate server elsewhere, set your text editor and the username you want to use.
- Start and complete the installation.
Setup the Environment Variables
Open command prompt in windows and type the following:
p4 setYou should see the following:
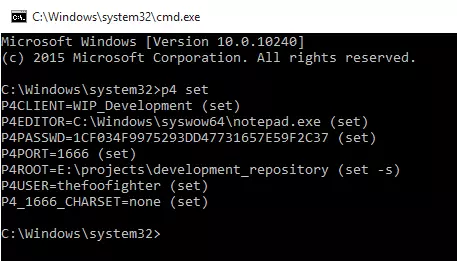
Issue the following command:
p4 set P4CLIENT=WIP_DevelopmentBasically P4CLIENT should be the same name as the name of your workspace in P4V (Perforce GUI). We will create it shortly.
Note: You can set any of the listed variables using “p4 set”, This is useful if you need to change the location of the repository etc.
P4Admin The next tool we need to check out is P4Admin which should have installed with the Perforce visual components.
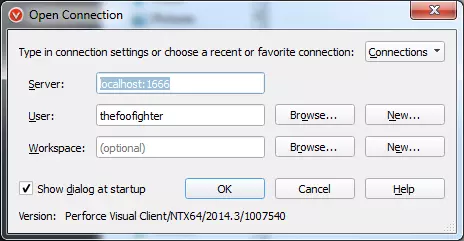
The Open Connection dialog should appear.
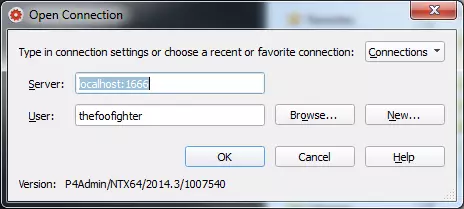
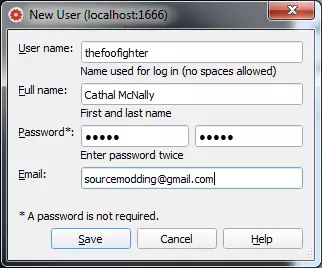
In my case the user did not exist when I tried to open the connection. So we just create a user.
Click on New and fill out the new user details.
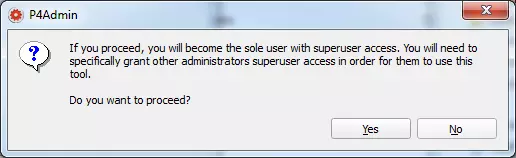
You will be presented with the following message if you open the connection. Hit yes because you want to be the administrator on this server.
P4Admin lets you create and manage users, groups and set permissions to each. For our use case, it is not necessary.
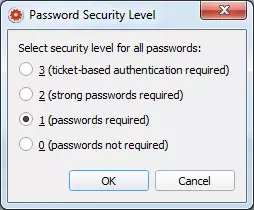
One thing I would advise you to do would be to require a password for the depot. You can change the password security level through the administration menu entry.
The last thing we can do but is not necessary (unless you want to follow step by step) is to rename the depot in p4admin.
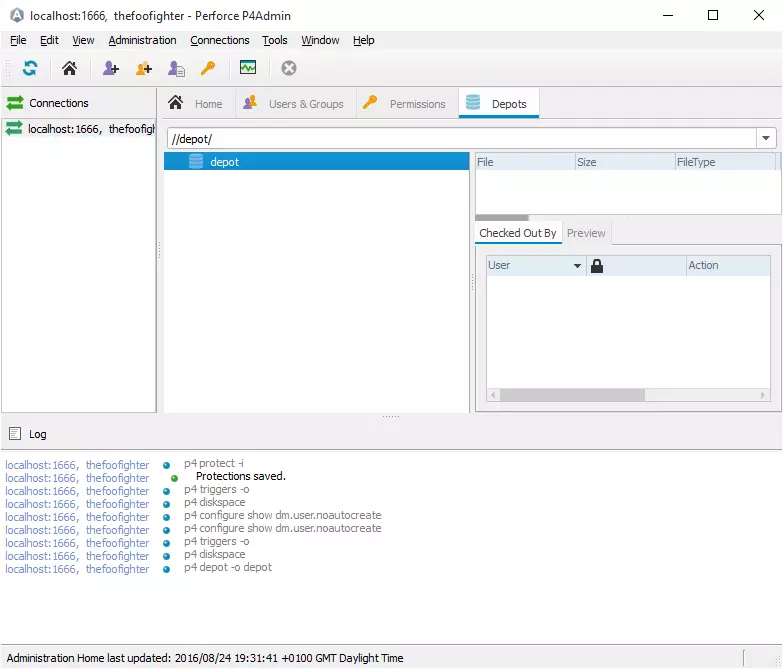
Select the “Depots” tab
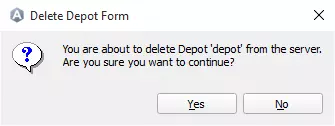
Right-Click on “depot”
Select “Delete Depot ‘depot’”
Select File > New > Depot to create a new Repository
Give it a name, I called mine “Projects”
That is all we have to do in P4 Admin.
P4V
P4V (GUI for Perforce) is where you typically would create the connection from your local working files and where you want to place them in the Perforce depot.
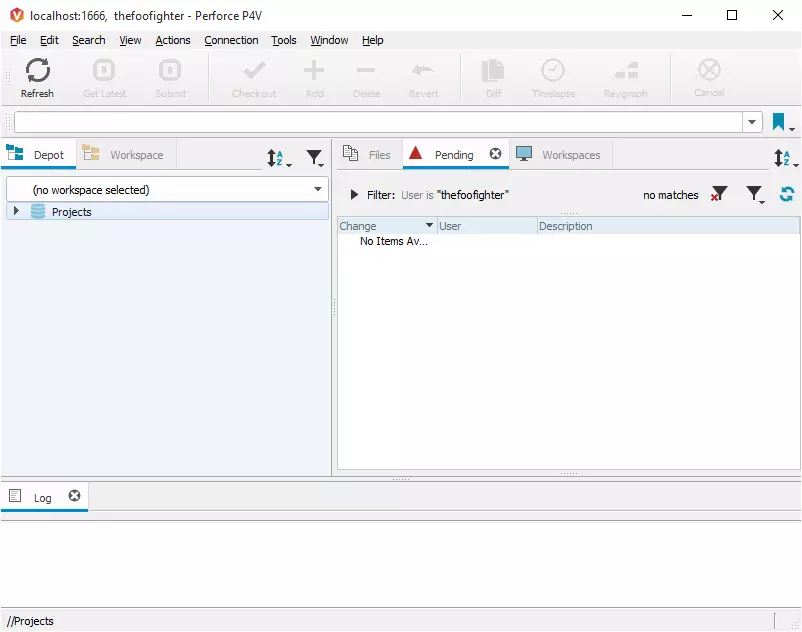
Firstly, start up P4V. You should see this:
For now, let us leave workspace blank as we have yet to create it.
P4V looks something like this: (It may seem daunting at first but it is not a difficult program to master, you probably will not need to use the majority of functions Perforce provides.)
Ok let’s create the Workspace that we will use for our Development Branch.
Click on the Workspaces Tab (If you cannot see it, it is accessible via the View Menu)
Right click in the white space and select “New Workspace”
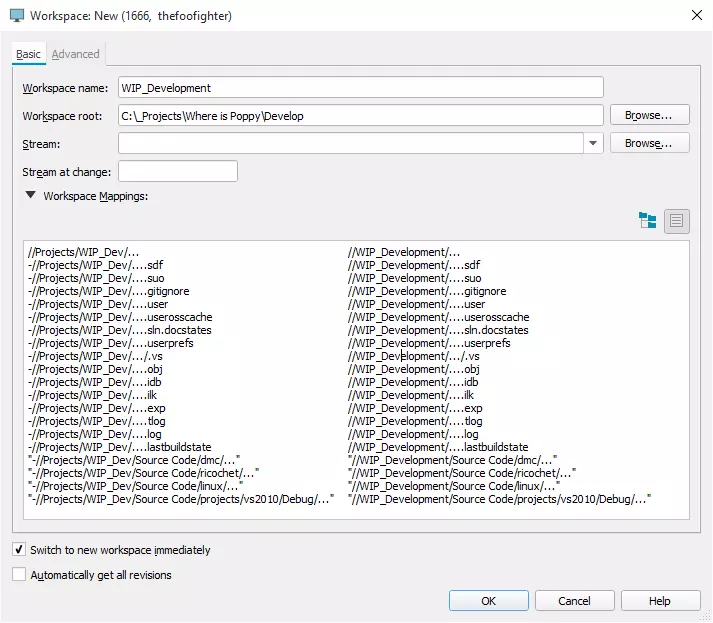
For Workspace Name call it “WIP_Development” (Like we called our P4CLIENT earlier)
Point it to the location on your PC where you will be working from. Mine is:
C:\_Projects\Where is Poppy\WIP_DevelopmentWorkspace mappings are used to map folders from the repository to your local workspace.
It also functions much like a “.gitignore” by settings file types or specific locations you do or don’t want versioned.
My mapping looks like the following:
//Projects/WIP_Dev/... 											//WIP_Development/...
-//Projects/WIP_Dev/....sdf 									//WIP_Development/....sdf
-//Projects/WIP_Dev/....suo 									//WIP_Development/....suo
-//Projects/WIP_Dev/....gitignore 								//WIP_Development/....gitignore
-//Projects/WIP_Dev/....user 									//WIP_Development/....user
-//Projects/WIP_Dev/....userosscache 							//WIP_Development/....userosscache
-//Projects/WIP_Dev/....sln.docstates 							//WIP_Development/....sln.docstates
-//Projects/WIP_Dev/....userprefs 								//WIP_Development/....userprefs
-//Projects/WIP_Dev/.../.vs 									//WIP_Development/.../.vs
-//Projects/WIP_Dev/....obj 									//WIP_Development/....obj
-//Projects/WIP_Dev/....idb 									//WIP_Development/....idb
-//Projects/WIP_Dev/....ilk 									//WIP_Development/....ilk
-//Projects/WIP_Dev/....exp 									//WIP_Development/....exp
-//Projects/WIP_Dev/....tlog 									//WIP_Development/....tlog
-//Projects/WIP_Dev/....log 									//WIP_Development/....log
-//Projects/WIP_Dev/....lastbuildstate 							//WIP_Development/....lastbuildstate
"-//Projects/WIP_Dev/Source Code/dmc/..." 						"//WIP_Development/Source Code/dmc/..."
"-//Projects/WIP_Dev/Source Code/ricochet/..." 					"//WIP_Development/Source Code/ricochet/..."
"-//Projects/WIP_Dev/Source Code/linux/..." 					"//WIP_Development/Source Code/linux/..."
"-//Projects/WIP_Dev/Source Code/projects/vs2010/Debug/..." 	"//WIP_Development/Source Code/projects/vs2010/Debug/..."
The first line directs Perforce to include the whole repository and version it under “WIP_Development” which we set above to be:
C:\_Projects\Where is Poppy\WIP_DevelopmentImagine “WIP_Development” as a variable that holds the above path.
Note: This is our Project Source Directory which we will be setting up later, for now create an empty directory.
The remaining lines with a preceding minus “ – ” are being told to exclude files and directories from being versioned, These include intermediately created files from visual studio that we don’t want to clutter out commits with.
Save your workspace and select it.
If you see the following message, there are files within your selected project folder. This may be because you are moving from one PC to another or you prepared source assets within it already.
In my case I choose “No”
If you see the following Screen Ignore it and Cancel.
For paths with spaces be sure to use enclosing “quotes”.
For those interested my Release branch is basically the same setup but in the above workspace mappings “WIP_Dev” is replaced with “WIP_Rel” and the Workspace itself is called “Release” and not “Develop” I would then have to set “P4CLIENT=Release” If I ever want to commit files to that repository.
As I won’t be building the code on Release frequently (I mostly merge to it from the Develop branch – binaries included) it won’t really be an issue.
Level Editor
Install your level editor of choice, I will be using (J.A.C.K) Jackhammer in the context of this tutorial.
Note: Be sure in the setup to correctly point Jackhammer to your Half-Life executable hl.exe
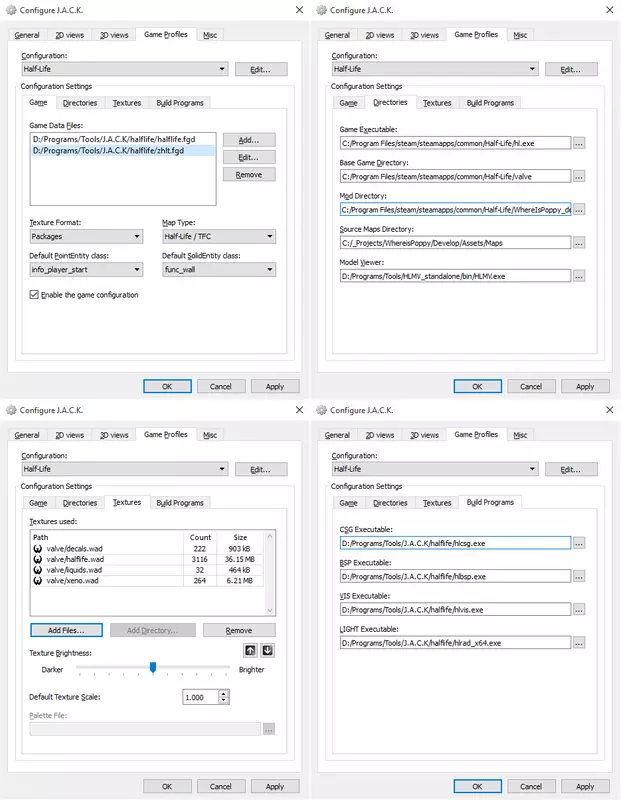
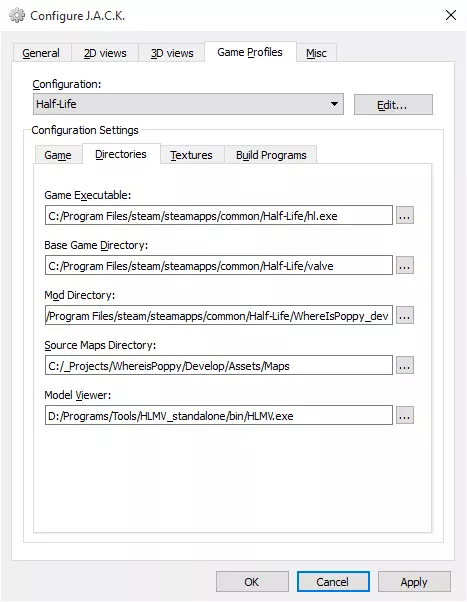
For Jackhammer under Options > Game Profiles Be sure to check and update if necessary the paths to the Game, Directories, Textures and Build Programs. I installed Jack in a location other than its default and some of these paths failed because they hadn’t updated.
Prepare the Directory
Create a Mod folder inside the Half-Life directory. Something along these lines:
C:\Program Files\steam\steamapps\common\Half-Life\WhereIsPoppy_devNote: You should not have any spaces in the Mod folder name to avoid potential issues. Use Camel Case or underscores if you need to break up words.
Concept: A Modification (Mod)
The general idea behind a Mod is fairly simple and quite ingenious as well. Valve created a generic engine structure which is abstract enough to lend itself to any number of custom mods. You simply need to create a folder inside the Half-Life folder and give it the name of your Mod (To avoid potential future issues, keep white spaces out of the folder name i.e. Spaces). The subfolders within your mod folder should be named the same way as the subfolders inside the “valve” directory within the Half-Life folder.
Why do this you ask? Well the explanation is simple, you are making a modification of Half-life, not a whole new game from scratch so you need to follow the engine structure Valve set-up for Half-Life. Then all you have to do is place models and textures in their appropriate subfolders. You can make uniquely named assets or you can be lazy and create assets with the exact same name and directory structure as vanilla Half-Life assets. The engine will look in your mod folder first and use that before looking in the original games folder.
The benefit to this is that you save yourself some work especially if you only want to replace for example the texture of an original Half-Life model and use the existing mesh. You would only have to place a texture of the exact same name and location in your mod folder so that the engine can find and use it rather than the original texture. This way you also preserve the original Half-life folder and its assets.
Your mod folder should contain at least some of these folders:
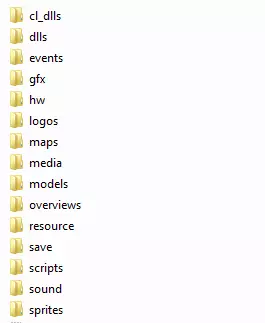
Explanation of folder purposes
cl_dlls – Harbour for the Client side dll files
dlls – Harbour for the main game dll files
events – Contains event placeholders for client playback. Read more about it.
gfx – Contains graphics for the Half-Life launcher shell and map skies
hw – Contains hardware specific optimization scripts
logos – Contains game logos/Sprays
maps – Location of all the maps and stores the nodegraphs
media – Contains launcher sounds
models – Location of the game models
overviews – Contains the overviews for the maps
resource – UI related contents and resources
save – Stores the saved game files
scripts – scripts folder
sound – Contains any sounds used in the game
sprites – Contains special effect sprites and sprites for the heads-up-display
Liblist.gam is a text based file that acts as a descriptor for your mod, if you are familiar with Source engine mods the spiritual equivalent is gameinfo.txt. It is structured as such:
Key [string] : Value“[string]”Liblist.gam’s keys explained:
Each line has one Key followed by its Value which Half-Life uses to display and initialize your Mod.
Key					Value			Description
game				"string"		// Mod Name
icon				"string"		// Name of image used as an Icon in Steam
developer			"string"		// Name of Mod/Game Developer
developer_url		"string"		// Home Website of game
manual				"string"		// Link to the games manual
gamedll				"string"		// Name and relative location of the games main library file [Win(dll)]
gamedll_linux		"string"		// Name and relative location of the games main library [Linux(so)]
gamedll_osx			"string"		// Name and relative location of the games main library file [Mac(dylib)]
secure				"boolean"		// Allow VAC secure server
svonly				"boolean"		// Is it a Server only Mod?
cldll				"boolean"		// Use the client dll in the mod?
type				"string"		// singleplayer or Multiplayer mod
startmap			"string"		// Name of the games starting Map
trainmap			"string"		// Name of the games training Map
mpentity			"string"		// WON, Deprecated. Omit maps with this name in it.
mpfilter        	"string"		// Omit maps with this name in it.
fallback_dir		"string"		// set a fallback mod directory
fallback_maps		"string"		// set a fallback map
nomodels			"boolean"		// Don’t show models in browser since you don’t pick them there.
nohimodels			"boolean"		// Use high or low poly models
detailed_textures	"boolean"		// Use detailed textures in the mod for better quality
The version Half-Life uses looks like this:
//  Valve Game Info file
//  These are key/value pairs.  Certain mods will use different settings.
//
game "Half-Life"
startmap "c0a0"
trainmap "t0a0"
mpentity "info_player_deathmatch"
gamedll "dlls\hl.dll"
gamedll_linux "dlls/hl.so"
gamedll_osx "dlls/hl.dylib"
secure "1"
type "singleplayer_only"
Your Mods liblist.gam should be located in the root of your Mod folder. Using this as a base I will create one in the “Where is Poppy” Mod folder.
// Where is Poppy Liblist.gam
// 19.09.2015
// Cathal McNally

game "Where is Poppy"
icon "wip_icon"
startmap "poppy_map01"
mpentity "info_player_deathmatch"
gamedll "dlls\wip.dll"
cldll "1"
secure "1"
type "singleplayer_only"
Note: This may change over time, for now it will suffice. If it does change I will inform you in future tutorials
Next item on the list is to compile your games code.
You should at least have created in your mods folder subfolders named “dlls”, “cl_dlls” & “maps“
It will look something like this:
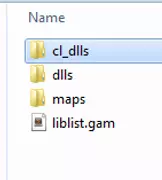
The dlls folder will contain your MODs main code library.
The cl_dlls folder will contain the client dll for the MOD.
The maps folder will contain your compiled maps.
Important Note: If you are having issues with the filecopy.bat relating to access denied make sure you change the security permissions of the whereIsPoppy_dev Mod folder to allow the current full control over it. Otherwise Windows prevents Visual Studio from copying the file.
Half-Life will look for your liblist.gam and read its contents according to how you set them.
Project Management, Folder Structure & Version Control
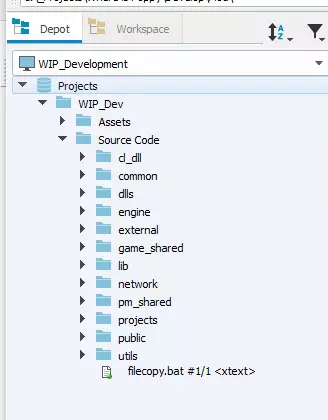
I have an overall Projects folder I use for games development where I try to keep everything tidy and organised. Since all projects are different and everyone has their own idea of how best to structure a project I will simply provide mine as an example of what you can do. It looks something like this:
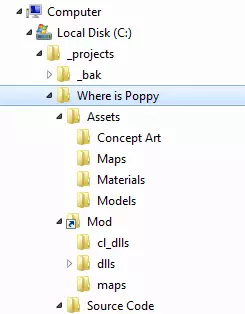
Where is Poppy is the Root Project Folder
Assets is a directory for source maps, textures, models, concept art, documentation etc..
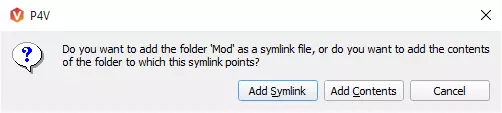
Mod is a Symlink to the WhereIsPoppy folder found in the Steam/Steamapps/common/Halflife directory (I use a symlink so that I can version everything together with Perforce). To create the symlink I did the following:
-
I shift right clicked inside the Where is Poppy project folder and opened a Commandline Window
-
I typed the following:
mklink /D Mod “C:\Program Files\steam\steamapps\common\Half-Life\WhereIsPoppy_dev”
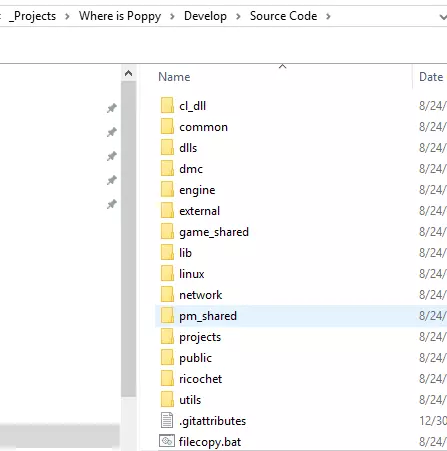
Source Code is a directory to store the Half-Life SDK code we will be compiling. Extract (or clone if you use Git) the contents of the Half-Life SDK you downloaded from Github “halflife-master.zip” into your Projects Source Code directory. Mine is located here:
C:\_Projects\WhereIsPoppy\Develop\Source Code”It should look something like this:
So now that you have you an initial state for your Source Project including the Source Code, Assets and the Mod Symlink we can add this to Perforce.
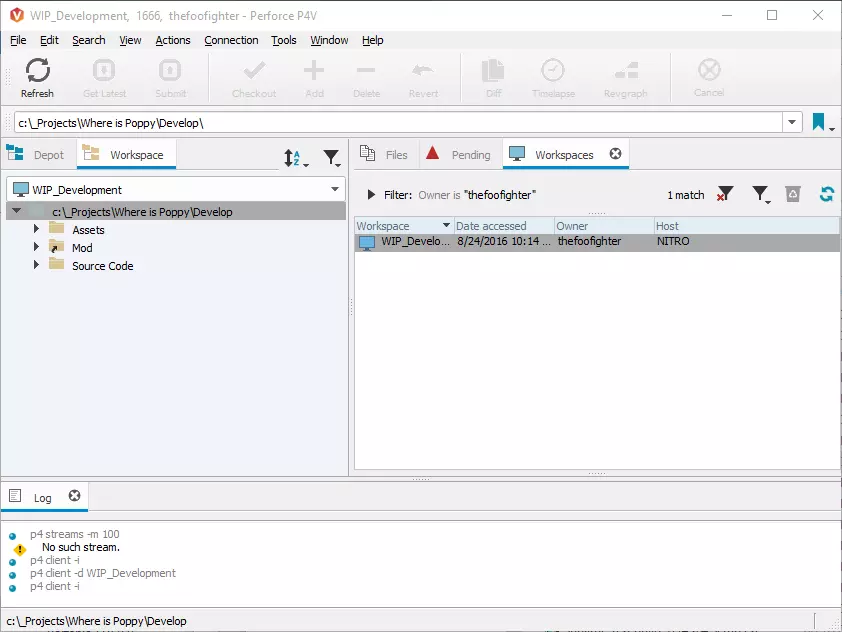
Start P4V Select your WIP_Development Workspace. You should see something along these lines:
Highlight the folders in the Workspace and select “Mark for Add” from the Right-Click Menu.

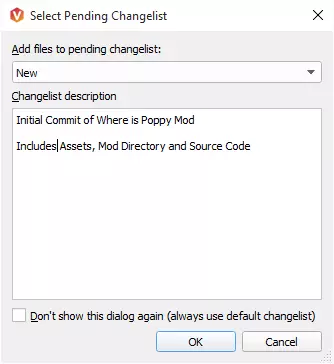
For Select Pending Changelist: Select “New” and add a description for your initial commit.
Switch to the Pending Tab. The files will all be added to the Pending Changelist “1”
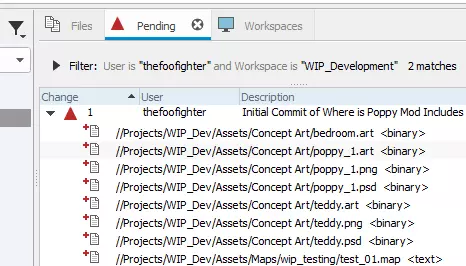
Right click on the Pending Changelist “1” and Click “Submit”
It will present you with a confirmation dialog, select “Submit”.
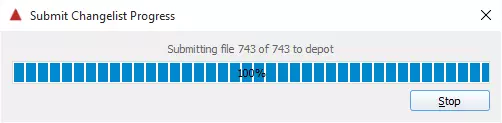
You should see its progress:
Your files will now have been added to the Projects Repository. You can check this by selecting the “Depot” tab.
If you want to edit these files in future, you need to put them on a pending changelist prior to making changes as Perforce now controls the Read-Only state of all the files it versions.
Open main project and unload unrequired projects
Let’s switch over to Visual Studio where we can load up the Half-life SDK. The solution can be found inside the projects/vs2010/ folder and is named projects.sln.
Open this with Visual studio and follow any onscreen prompts that may popup to convert the codebase to work with your version of Visual studio if you are using anything greater than 2010.
You will see something like the following if it loaded correctly:
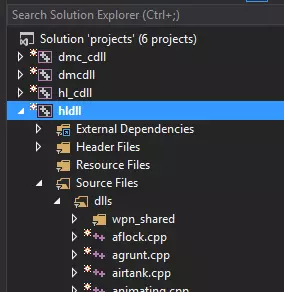
hldll is the main project to worry about game specific features in your MOD/Game.
hl_cdll is the client dll project and contains important code we will modify in the soon future.
Firstly let’s right click on dmc_cdll, dmcdll, ricochet_cdll, ricochetdll and unload them since we don’t really need to use them.
Right click on hldll and set the Configuration in the top left corner to “All Configurations”. This means that changes we make to the properties page will propagate through all project configurations in this case both Debug and Release. Do the same for hl_cdll.
Suppress unnecessary warnings
Let’s also suppress the unnecessary warnings Visual Studio spits out.
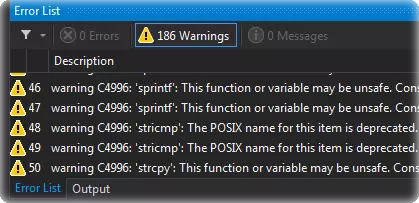
Right click on hldll and under Properties navigate to Configurations Properties -> C/C++ -> Advanced, (Make sure to set “All Configurations” so that it affects both Debug Release)
For “Disable Specific Warnings“ add the following:
4028;4058;4996Do the same for cl_dll
Rename Target Library (Dll name)
RightClick on hldll and select Properties. Let’s rename what the output library will be called so we can personalize it for our project. There is no real need to do this to hl_cdll (Its name cannot be changed in liblist.gam as far as I am aware unlike hldll.)
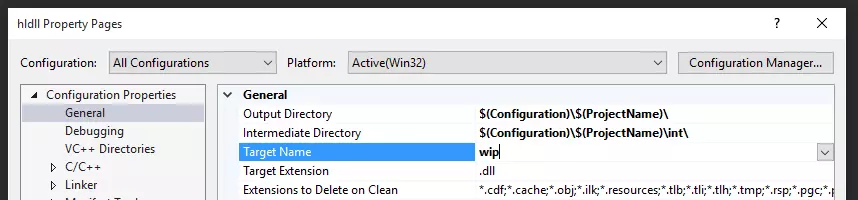
Under Configuration Properties -> General Set Target Name to whatever you want your mod to be called. (wip in my case)
Next up we should modify the post build event of both hldll & hl_cdll to suit our requirements. Under Build Events -> Post-Build Event Set Command Line to suit your needs.
It originally looked like:
call ..\..\filecopy.bat $(TargetPath) ..\..\..\game\mod\dlls\$(TargetName).dll
call ..\..\filecopy.bat $(TargetDir)\$(TargetName).pdb ..\..\..\game\mod\dlls\$(TargetName).pdb
Mine looks like the following now for hl_dll:
call ..\..\filecopy.bat "$(TargetDir)$(TargetName).dll" "C:\_Projects\Where is Poppy\Develop\Mod\dlls\$(TargetName).dll"
call ..\..\filecopy.bat "$(TargetDir)$(TargetName).pdb" "C:\_Projects\Where is Poppy\Develop\Mod\dlls\$(TargetName).pdb"
Mine looks like the following for hl_cdll:
call ..\..\filecopy.bat "$(TargetDir)$(TargetName).dll" "C:\_Projects\Where is Poppy\Develop\Mod\cl_dlls\$(TargetName).dll"
call ..\..\filecopy.bat "$(TargetDir)$(TargetName).pdb" "C:\_Projects\Where is Poppy\Develop\Mod\cl_dlls\$(TargetName).pdb"
Basically what this does is call an external batch file which will copy the file from parameter 1 to parameter 2. In our case we want to copy the dll & pdb (project debug info) files from the source code location to our mods dlls folder where it can be used.
I have enclosed the paths in quotes so when filecopy.bat tries to load the given paths it won’t fail with a spacing issue. I changed the first line to specifically copy the game dll and not the whole TargetPath folder
Note: $(TargetDir) & $(TargetName) are Visual Studio macros used for aiding with keeping paths dynamic incase things such as the project name change etc.
I used a full path in my second parameters as there is no macro set for them. Read here if you want to create custom macros in VS.
I edited filecopy.bat to suit my needs a little better. For the sake of comparison it looked like the following before my edits:
rem @echo off
rem echo %~f2
p4 edit %~f2
@copy %1 %~f2
It reads as the following now:
@echo on

set "sourcePath=%~f1"
set "targetPath=%~f2"

echo "SourcePath : %sourcePath%"
echo "TargetPath : %targetPath%"

p4 edit "%targetPath%"
p4 add "%targetPath%"

@copy "%sourcePath%" "%targetPath%"
It basically carries out the same procedure as before except I created local variables to store the parameters as well as an extra Perforce command. “p4 add” which tells perforce to open the file for add if it has not been versioned before (only really necessary on first compile or if you change the dll name)
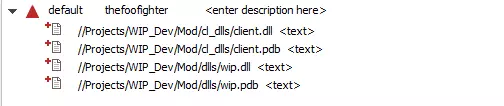
You can check over in P4V there should be changelist that includes the dll and pdb files you just compiled.
If you get an error in Visual Studio about file is not under the client make sure that P4CLIENT is set to the name of your workspace and that the Symlink functions i.e. takes you to the WhereIsPoppy_dev mod folder.
You can edit this file to work for your own version control system such as git, mercurial and svn or you can completely remove the perforce commands and only use the copy feature.
Now that this is all prepared you can go on ahead and Compile your code in Visual Studio for hldll & hl_cdll and hopefully if no errors occur you will see your dll file & pdb files pop up in your mods dll folders.
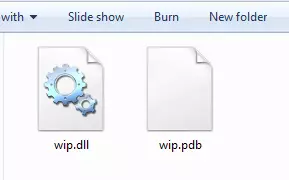
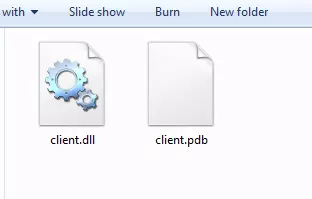
If you are using Perforce you should notice (Press F5 to refresh) that the 4 files that were copied to the Mod directory have been added to a default changelist for addition or edit in the server.
Restart steam. If everything is setup correctly you should see your mod listed on your game list.
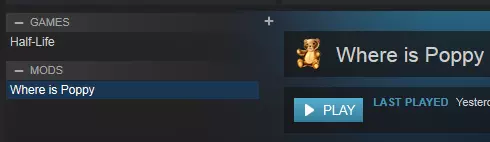
To see an icon in steam declare it in your liblist.gam file as:
Icon "wip_icon"The icon should be a 32 * 32 sized Targa image. Do not add the .tga file extension to the name in liblist.gam
Go ahead and launch the Mod, It should launch with a vanilla Half-Life using your custom dlls if you set your parameters correctly in the liblist.gam
Note: I am using the last free version of Jackhammer, an up to date replacement for Hammer/Worldcraft
This is not really and overly important or necessary step but having a small plain block room to test your code changes can be useful while you develop.
Fire up Jackhammer.
Open Tools -> Options
Double check that under Game Profiles Half-Life is the selected Configuration.
Under directories change the Source Maps Directory to your mods “map” folder
I would recommend installing JHLMV for viewing models through Jackhammer. Learn more about JHLMV here.
Provide the Directory to your mod under “Mod Directory” and ensure the remaining paths make sense.
Mine looks like the following:
Now click File -> New.
In the small dialog that pops up you have some options for creating a default room if you like.
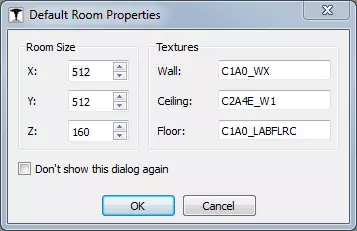
In my case I will go with the default settings and hit OK
This will create a small room with a light, textured floor/walls/ceiling & player start, like this..
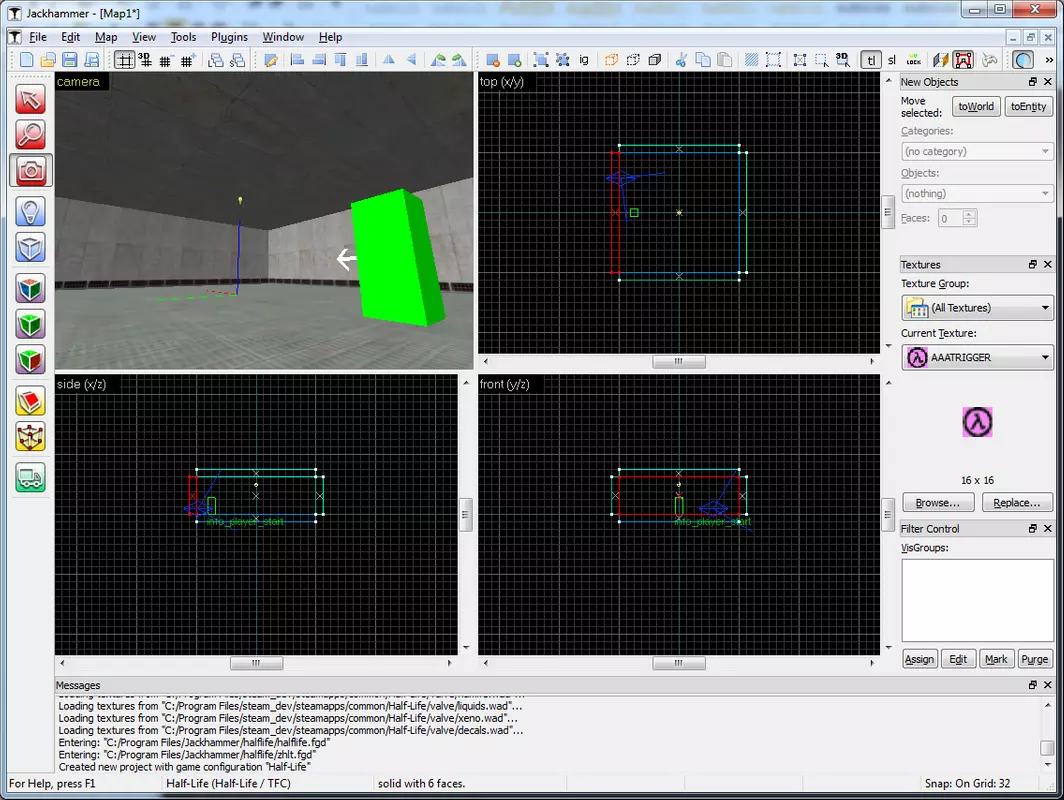
For now this is enough for our debugging and testing needs. Click on File -> Run.
If it asks you to, save a map source file (.rmf/.jmf) into your Mods Source Map folder. Jack will copy the compiled version to the actual Mods Map folder.
In the pre-compile Dialog that pops up make sure to set some console commands for Half-Life to obey.
It should look something like the following:

“-game WhereIsPoppy_dev” : Explicitly set your Mod here
“-dev -console” : start the engine in dev mode with console
“-condebug” : writes everything logged in the console to a text file console.log
For now ignore the remaining options.. Click OK,
If Jackhammer asks you to save the map (.MAP) place it in your Mods “maps” folder next to the previously saved .rmf/.jmf
Note: During the compilation process the .MAP file is compressed and compiled into a .BSP which the engine can read and use. RMF/JMF/MAP files are text based source files whereas BSP is the compiled & compressed binary.
Wait for a successful build and watch as it runs half-Life and places you in the map you just created.
To be sure that Half-life is using your custom dll press the console key which should be represented by ~ (tilde) on your keyboard.
Look back through the log until you come across the section displaying this:

This confirms that it loaded both your custom dll & newly created map.
You can go ahead now and add all your new files to Perforce, revert unchanged files and commit your files with a meaningful description.